/** * Create a new request wrapper that will merge additional parameters into * the request object without prematurely reading parameters from the * original request. * * @param request * @param additionalParams */ publicPrettyFacesWrappedRequest(final HttpServletRequest request, final Map<String, String[]> additionalParams) { super(request); modifiableParameters = new HashMap<String, String[]>(); modifiableParameters.putAll(additionalParams); }
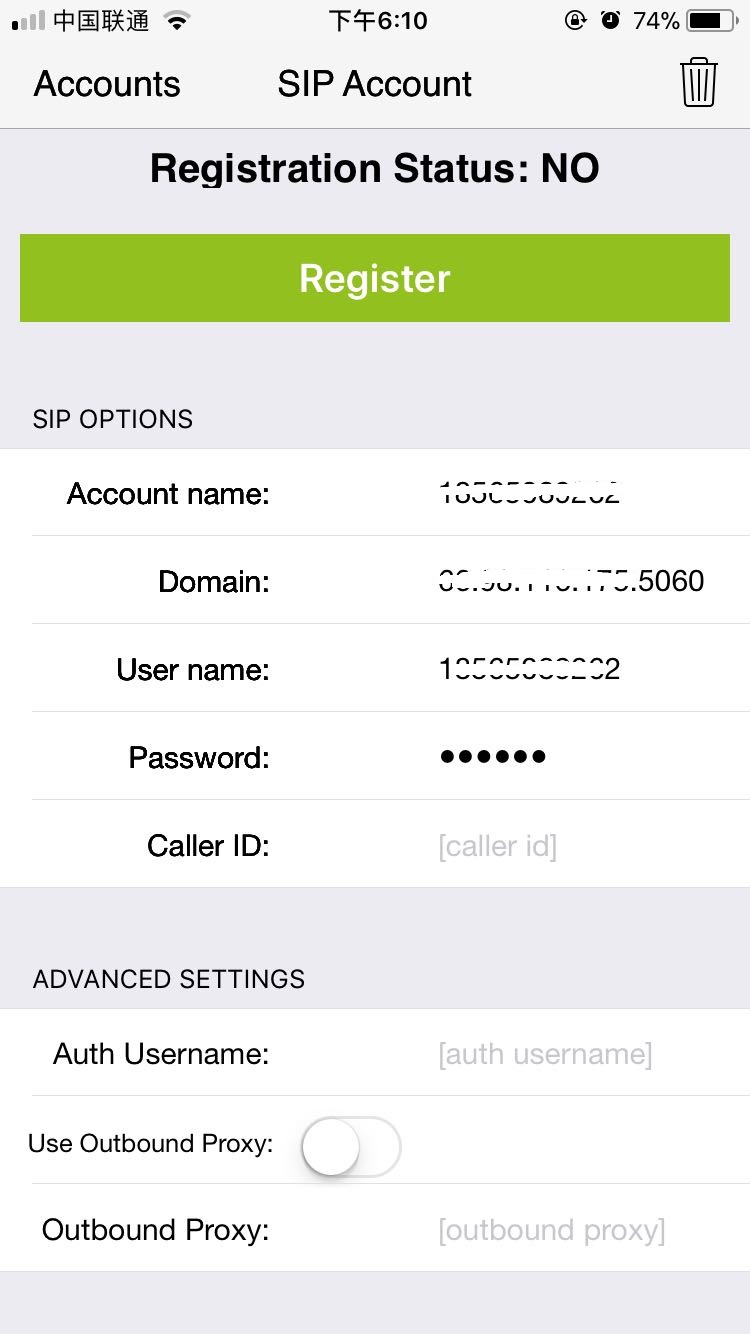
## your SIP domain
SIP_DOMAIN=yourip
## chrooted directory
# $CHROOT_DIR="/path/to/chrooted/directory"
## database type: MYSQL, PGSQL, ORACLE, DB_BERKELEY, or DBTEXT,
## by default none is loaded
# If you want to setup a database with opensipsdbctl, you must at least specify
# this parameter.
DBENGINE=MYSQL
## database host
DBHOST=localhost
## database name (for ORACLE this is TNS name)
DBNAME=opensips
# database path used by dbtext or db_berkeley
DB_PATH="/usr/local/etc/opensips/dbtext"
## database read/write user
DBRWUSER=opensips
## password for database read/write user
DBRWPW="opensipsrw"
## database super user (for ORACLE this is 'scheme-creator' user)
DBROOTUSER="root"
# user name column
USERCOL="username"
MySQL password for root:
INFO: test server charset
INFO: creating database opensips ...
INFO: Core OpenSIPS tables succesfully created.
Install presence related tables? (y/n): y
INFO: creating presence tables into opensips ...
INFO: Presence tables succesfully created.
Install tables for imc cpl siptrace domainpolicy carrierroute userblacklist? (y/n): y
INFO: creating extra tables into opensips ...
INFO: Extra tables succesfully created.
如果出现 ERROR: database engine not specified, please setup one in the config script,看看是否有执行权限
CLEAN_PERIOD=1800 - Interval in seconds to sleep after completing a cleaning run. Defaults to 1800 seconds = 30 minutes.
DELAY_TIME=1800 - Seconds to wait before removing exited containers and unused images. Defaults to 1800 seconds = 30 minutes.
KEEP_IMAGES - List of images to avoid cleaning, e.g. “ubuntu:trusty, ubuntu:latest”. Defaults to clean all unused images.
KEEP_CONTAINERS - List of images for exited or dead containers to avoid cleaning, e.g. “ubuntu:trusty, ubuntu:latest”.
KEEP_CONTAINERS_NAMED - List of names for exited or dead containers to avoid cleaning, e.g. “my-container1, persistent-data”.
LOOP - Add the ability to do non-looped cleanups, run it once and exit. Options are true, false. Defaults to true to run it forever in loops.
DEBUG - Set to 1 to enable more debugging output on pattern matches
DOCKER_API_VERSION - The docker API version to use. This defaults to 1.20, but you can override it here in case the docker version on your host differs from the one that is installed in this container. You can find - this on your host system by running docker version --format '{{.Client.APIVersion}}'.