如何在rk3588上运行openpilot[1]

本文来自 https://birdzhang.xyz/2024/04/14/如何在rk3588上运行openpilot-1/ 转载请注明出处

1. 前言

2024-07-03 更新,现在的openpilot已经对aarch64设备有良好的支持,不用再去改很多SConstruct进行修改了,👍

使用rk3588跑openpilot的难点,主要在模型的适配上(相机部分已经很好的解决了,之前没有visionipc的时候是比较复杂的),以及兼容aarch64系统的打包等等

2. 系统适配

笔者使用的是 https://github.com/Joshua-Riek/ubuntu-rockchip 修改过的,可以兼容各个厂商出的rk3588板子,方面好用。安装好git等常用工具后,把openpilot的代码clone下来,然后执行tools/ubuntu_setup.sh即可安装上绝大多数的依赖。

对于rk3588,还有一些特殊的依赖需要安装,比如mpp、gstreamer部分,以及opencv需要重新编译添加gstreamer支持。笔者使用的是opencv_headless,参考 https://github.com/opencv/opencv/issues/21804

使用的gstreamer依赖:

1
2
3
4
5
6
7
8
9
10
sudo apt-get install --no-install-recommends \
gstreamer1.0-gl \
gstreamer1.0-opencv \
gstreamer1.0-plugins-bad \
gstreamer1.0-plugins-good \
gstreamer1.0-plugins-ugly \
gstreamer1.0-tools \
libgstreamer-plugins-base1.0-dev \
libgstreamer1.0-0 \
libgstreamer1.0-dev

对于rknn的运行环境,参考瑞芯微的文档即可

3. 模型适配

模型适配主要分为两个部分,一个是模型本身,一个是模型加载的代码。这里我们只讲模型执行的部分(因为我对模型量化不了解🤦‍♂️

现在comma公司刻意简化模型的runner,我们可以根据onnxmodel.py很方便的改出rknnmodel.py。

首先我们定义一个字典,把模型的参数都放在里面,如下:

1
2
3
4
5
6
7
8
9
10
11
12
13
14
15
16
17
18
19
20
21
22
23
24
25
26
27
28
29
30
31
32
33
34
35
36
37
38
39
40
41
42
43
model_inputs = {
"road": {
"input_names": ['input_imgs', 'big_input_imgs', 'desire', 'traffic_convention', 'nav_features', 'nav_instructions', 'features_buffer'],
"input_shapes": {
'input_imgs': [1, 12, 128, 256],
'big_input_imgs': [1, 12, 128, 256],
'desire': [1, 100, 8],
'traffic_convention': [1, 2],
'nav_features': [1, 256],
'nav_instructions': [1,150],
'features_buffer': [1, 99, 128]
},
"input_dtypes": {
'input_imgs': np.float32,
'big_input_imgs': np.float32,
'desire': np.float32,
'traffic_convention': np.float32,
'nav_features': np.float32,
'nav_instructions': np.float32,
'features_buffer': np.float32
}
},
"nav":{
"input_names": ['input_img'],
"input_shapes": {
"input_img":[1,1,256,256]
},
"input_dtypes": {
"input_img":np.float32
}
},
"dmonitor":{
"input_names": ['input_img', 'calib'],
"input_shapes": {
"input_img":[1,1382400],
"calib": [1,3]
},
"input_dtypes": {
"input_img":np.float32,
"calib": np.float32
}
}
}

再定义一个key,根据模型来区分,例如:

1
2
3
4
5
6
7
8
9
10
11
12
13
self.search_key = ""
# self.input_names = [x.name for x in self.session.get_inputs()]
# self.input_shapes = {x.name: [1, *x.shape[1:]] for x in self.session.get_inputs()}
# self.input_dtypes = {x.name: ORT_TYPES_TO_NP_TYPES[x.type] for x in self.session.get_inputs()}
if "nav" in path:
self.search_key = "nav"
elif "dmonitor" in path:
self.search_key = "dmonitor"
elif "supercombo" in path:
self.search_key = "road"
self.input_names = model_inputs.get(self.search_key).get("input_names")
self.input_shapes = model_inputs.get(self.search_key).get("input_shapes")
self.input_dtypes = model_inputs.get(self.search_key).get("input_dtypes")

剩下的应该你都懂了怎么使用了😛。

4. SConscript修改

rk3588明显是aarch64架构的,和C3一样的架构,但不是高通的,用不到SNPE,所以我们既要兼容一部分larch64的,也有一部分linux aarch64的。

例如添加/usr/lib/aarch64-linux-gnu的path,注释掉'system/camerad/SConscript',重新编译third_party/acados等等,需要一些尝试

5. 运行

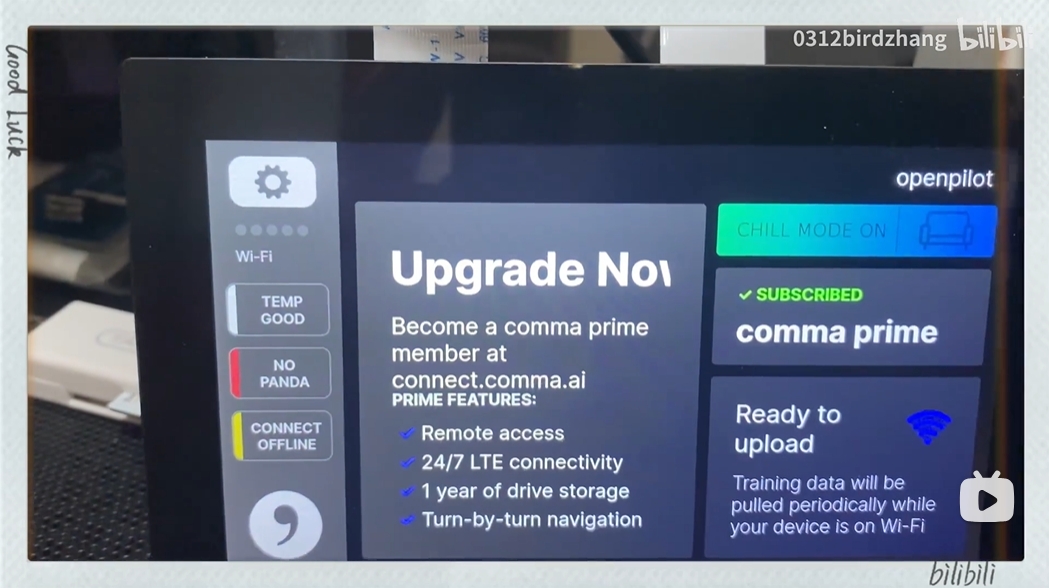
假如都改好了后,运行./launch_openpilot.sh应该就会看到界面了

如果遇到其他问题,欢迎在评论区留言。如果有比较多人关注,会出第二期详细的内容。

okcaros移植到红米note8及体验

最近okcaros开放第三方移植了,我就简单试了一下,有点惊喜

okcaros官网 https://www.okcaros.com/zh ,实现原理是通过更改usb协议,欺骗carplay来映射安卓手机的内容,思路还是挺好的

适配过程比较简单,给kernel“打个补丁”,引入一下okcar代码,编译就完事了(实际是在AMD r7-5800上面,16G内存的虚拟机上,要跑12+小时😂

上两张图

—————2024年04月14日 16点32分—————

继续上次没写完的内容。代码已经合并到okcaros的仓库了,可以clone下来直接编译了,代码参见 https://github.com/okcar-os?q=ginkgo&type=all&language=&sort=

当然,既然合并到上游仓库了,自然是提供直接下载的 https://download.okcaros.com/devices/ginkgo/builds

另外,发现有windows下的安装工具了,https://okcar-cdn.okcarbox.com/app/okcaros_installer_1.0.0.exe

关于香橙派5运行flowpilot

香橙派5是一款使用瑞芯微rk3588的开发板,有3个usb接口(1个type-c和type-a公用,虽然4个其实3个),一个hdmi接口,一个千兆网口,等等

废话不多说,下面是如何安装flowpilot

前置条件

  • 起码一个usb摄像头
  • 一块屏幕,HDMI的或者mipi dsi的都行
  • 其他的就是能让Ubuntu系统启动所必须的硬件了,如硬盘或emmc或sd卡,散热装置等

安装系统

这里我使用的是 https://github.com/Joshua-Riek/ubuntu-rockchip

如果你是用sd卡,那么只需要把系统dd进去即可
其他的参考官方的烧录方法,此处不赘述

安装flowpilot

这里基本是按照 https://github.com/flowdriveai/flowpilot/wiki/Installation 方法进行的,除此之外还要安装一些额外的包

1
2
3
sudo apt install ffmpeg libavformat-dev libavcodec-dev libswscale-dev \
libssl-dev libcurl4-openssl-dev ocl-icd-opencl-dev libgflags-dev \
libstdc++-12-dev libprotobuf-dev protobuf-compiler

源码可以参考我更改的fork https://github.com/0312birdzhang/flowpilot ,主要修改了一些兼容性,以及替换了opencl为系统自带的,还有就是编译了aarch64上面的几个libraries

配置摄像头和车型,更改 launch_flowpilot_new.sh,进入flowpilot的目录下,运行pipenv shell,然后执行launch_flowpilot_new.sh即可

体验

总体来说只能说跑起来了,离日常使用还比较遥远,例如设备发热严重(没有用到rknpu,使用tnn跑只能调用GPU性能要比调用NPU差点,需要写JNI来调用rknpu跑,暂时没精力研究这部分了)、还没有驾驶员监控、上游进度缓慢等等,所以我也转向原生openpilot上了。

记录一次Signal使用代理的过程

在网上找了很多方法,按照传统的思路,在cmd里面设置如下命令然后启动

1
2
set HTTP_PROXY=http://127.0.0.1:1081
set HTTPS_PROXY=http://127.0.0.1:1081

结果并不行,然后我发现了这个 https://github.com/signalapp/Signal-Desktop/pull/1855

1
2
3
set HTTPS_PROXY=http://127.0.0.1:1081
set WSS_PROXY=http://127.0.0.1:1081
set ALL_PROXY=http://127.0.0.1:1081

然后将Signal.exe拖进cmd,enter后就可以正常了。

Tomcat多实例session共享方案

Tomcat实现多实例session共享的方案还挺多的,up主使用了三种,最终选择了tomcat自带的Cluster集群方案。下面来说一下这三种方案的优缺点。

up主用的tomcat7,至于为什么还是7这么老的版本,因为高版本的对get请求有一些字符校验
另外,这些都是不用改java代码的,其他的没做研究

tomcat-redis-session-manager

这个应该是最常见的方案了,我们随便一搜就是这个,但是代码有些坑。。。

如: 这个 还有这个 等等,还有两个致命的bug,一是session保留时间过长,里面有一段代码 session.setMaxInactiveInterval(getMaxInactiveInterval() * 1000); ,这里多保留了1000倍的时间。二是每次访问都会有一条session记录保留,非常的耗费redis内存。

虽然上述俩bug本up主已经修复了,但是发现还会丢session,估计是redis的驱逐问题,也懒得去调试了。

redisson

本up主发现这个的时候以为终于得救了,看一下人家的官网 https://redisson.pro/ ,还有商业版,就觉得很靠谱。事实证明还是too young too naive啊

因为突然有一天,同事说你这个接口好慢,然后我发现整个机器负载都很高了,访问网站直接卡成狗,看了一下日志,jvm崩溃了 java.lang.OutOfMemoryError: GC overhead limit exceeded

上面那个不管是丢session还是保留时间太长,但是不至于把tomcat搞死。好家伙,这个直接把jvm干崩溃了,OOM可还行

Tomcat Cluster

这里有一个很详细的教程 http://xstarcd.github.io/wiki/Java/tomcat_cluster.html ,我就不赘述了。

注意,我直接贴他的tomcat配置发现有看不见的空行还是啥的,可以去tomcat网站复制。

注意2,一定要在web.xml中添加<distributable />

使用两天了,暂时没发现问题,有待后续观察。

从日志中查询链接文件中的链接是否最近有访问

链接文件a.txt内容如下

1
2
http://example.com/123.txt
http://example.com/456.txt

日志文件为从cdn下载的或者nginx的压缩日志,gz格式

思路:循环zcat压缩文件,然后两个文件都做一个处理,去掉重复的部分,然后对这俩文件进行重复统计,有的话说明链接有访问

简单的示例

1
2
3
4
5
6
7
8
#!/bin/bash
gzs=$(ls |grep gz)
for gz in $gzs;
do
echo "start $gz"
zcat $gz|awk '{print $7}'|sort -n|uniq -c|sort -n > tmp.txt
cat tmp.txt a.txt| sort -n| uniq -c|sort -n |awk '{if($1>1) print $2}' >> exist.txt
done

Gitlab CE使用drbd实现主备方案

痛点

由于Gitlab社区版是不提供高可用等方案的,只能定时备份出来然后出问题了再导入,有时候会丢失数据,而且耗时随着备份文件大小增加,后期维护成本高。

解决思路

在搜索了大量的方案之后,只有使用drbd的才是靠谱的,而且比较容易跟现有的结合,值得尝试。

安装drbd

这里都是参考了 csdn博主的 https://blog.csdn.net/allway2/article/details/102478719


DRBD使用LVM逻辑卷作为后端设备创建XFS文件系统在线添加磁盘扩容操作过程


#### 0.服务器环境信息

drbd1 192.168.111.132 CentOS 7
drbd2 192.168.111.190 CentOS 7


#### 1、禁用SELinux
在两个节点执行: # setenforce 0

##### 永久关闭
可以修改配置文件/etc/selinux/config,将其中SELINUX设置为disabled。

1
2
3
4
5
6
7
8
9
10
11
12
13
14
15
16
17
[root@localhost ~]# cat /etc/selinux/config   

# This file controls the state of SELinux on the system.
# SELINUX= can take one of these three values:
# enforcing - SELinux security policy is enforced.
# permissive - SELinux prints warnings instead of enforcing.
# disabled - No SELinux policy is loaded.
#SELINUX=enforcing
SELINUX=disabled
# SELINUXTYPE= can take one of three two values:
# targeted - Targeted processes are protected,
# minimum - Modification of targeted policy. Only selected processes are protected.
# mls - Multi Level Security protection.
SELINUXTYPE=targeted

# sestatus
SELinux status: disabled


关闭firewall:
1
2
systemctl stop firewalld.service #停止firewall
systemctl disable firewalld.service #禁止firewall开机启动


设置主机名:

1
2
hostnamectl set-hostname drbd1
hostnamectl set-hostname drbd2


#### 2、安装DRBD

在两个节点执行:
1
2
3
4
5
6
# rpm --import https://www.elrepo.org/RPM-GPG-KEY-elrepo.org
# rpm -Uvh http://www.elrepo.org/elrepo-release-7.0-3.el7.elrepo.noarch.rpm
# yum install drbd90-utils kmod-drbd90
# lsmod | grep -i drbd
# modprobe drbd
# echo drbd > /etc/modules-load.d/drbd.conf


#### 3、配置DRBD

在两个节点执行:
1
2
3
4
5
6
7
8
9
10
11
12
13
14
15
16
17
18
19
20
21
22
23
24
25
26
# mv /etc/drbd.d/global_common.conf /etc/drbd.d/global_common.conf.orig
# vi /etc/drbd.d/global_common.conf

global {
usage-count no;
}
common {
net {
protocol C;
}
}


# vi /etc/drbd.d/drbd0.res

resource drbd0 {
disk /dev/drbdvg/drbdlv;
device /dev/drbd0;
meta-disk internal;
on hostname1 {
address 192.168.111.132:7789;
}
on hostname2 {
address 192.168.111.190:7789;
}
}


1
2
3
4
5
6
7
8
9
# pvcreate /dev/sdb
# vgcreate drbdvg /dev/sdb
# lvcreate -l 100%VG -n drbdlv drbdvg
# lvscan
# drbdadm create-md drbd0

# systemctl start drbd
# drbdadm status
# cat /proc/drbd


在主节点执行:
1
2
3
4
5
6
7
8
9
10
# drbdadm primary drbd0 --force

# mkfs.xfs /dev/drbd0
# mount /dev/drbd0 /mnt
# touch /mnt/file{1..5}
# ls -l /mnt/
# df -hT
# vgdisplay
# pvdisplay
# lvdisplay

#### 4、在线扩容
在两个节点执行:
1
2
3
4
5
6
7
8
9
# lsblk
# pvcreate /dev/sdc
# pvdisplay
# vgdisplay
# vgextend drbdvg /dev/sdc
# lvs
# lvdisplay
# lvextend -l+100%FREE /dev/drbdvg/drbdlv
# lvs

等待数据同步完成
1
# watch drbdadm status

在主节点执行:
1
2
3
4
# drbdadm resize drbd0

# xfs_growfs /mnt
# df -hT

扩容完成,等待扩容数据同步完成
# watch drbdadm status

同步完成后可以进行切换测试

在主节点执行:
# umount /mnt/

在从节点执行:
1
2
3
4
5
6
# mount /dev/drbd0 /mnt
# ls -l /mnt/
# df -hT
# touch /mnt/file{11..15}
# ls -l /mnt/
# umount /mnt


在主节点执行:
1
2
# mount /dev/drbd0 /mnt
# ls -l /mnt

应用到Gitlab

如果已经在运行了,那可以在运行的机器上挂载另外一块硬盘,新开一台机器,这俩作为drbd的主备,将运行的gitlab data数据rsync到drbd管理的那块盘上即可

然后改一下gitlab的data位置,重启一下或者reconfigure一下即可。

python使用subprocess查看进程并过滤

来源: https://stackoverflow.com/questions/6780035/how-to-run-ps-cax-grep-something-in-python

将proc1的输出当作proc2的输入来实现

1
2
3
4
5
6
7
8
import subprocess

proc1 = subprocess.Popen(["ps","-ef"],stdout=subprocess.PIPE)
proc2 = subprocess.Popen(['grep', 'mysql'], stdin=proc1.stdout,
stdout=subprocess.PIPE, stderr=subprocess.PIPE)
proc1.stdout.close() # Allow proc1 to receive a SIGPIPE if proc2 exits.
out, err = proc2.communicate()
outline = '{0}'.format(out)

使用yavijava创建兼容低版本的虚拟机

痛点

在使用 https://github.com/yavijava/yavijava 创建虚拟机的过程中,默认会将虚拟机的兼容性自动设置为ESXI的版本,如在ESXI 6.5上创建的虚拟机,其兼容性则为 ESXi 6.5 及更高版本 (虚拟机版本 13), 这样导致迁移的时候不能将这个虚拟机迁移到小于ESXI 6.5版本的主机上。

解决

在查询很多资料之后,确认可以通过 https://www.altaro.com/vmware/4-ways-to-downgrade-the-vm-hardware-version/ 文中的方法,将虚拟机先从清单中删掉,更改虚拟机的vmx文件,将virtualHW.version改为需要的版本,重新注册虚拟机即可。

在已知了这些方法之后,进行尝试, 发现在初始化虚拟机之后是无法再进行更改的,只有创建的时候设置好才行,如下即可。

1
2
3
4
5
6
7
8
9
10
11
vmSpec.setVersion("vmx-10"); # 10 表示 esxi 5.5
// call the createVM_Task method on the vm folder
Task task = vmFolder.createVM_Task(vmSpec, rp, null);
String result = task.waitForTask();

if(result == Task.SUCCESS){
System.out.println("VM Created Sucessfully");
}else{
System.out.println("VM could not be created. ");
return;
}

debian,ubuntu无法使用apt下载源数据的解决方法

现象:

不管是默认的源还是ustc的都直接提示 Connection failed,但可以ping通。

1
2
3
4
5
6
7
8
9
10
11
12
13
root@77ec78c7b3b7:/# printf "deb http://mirrors.ustc.edu.cn/debian/ buster main contrib non-free\n#deb-src http://mirrors.ustc.edu.cn/debian/ buster main contrib non-free\ndeb http://mirrors.ustc.edu.cn/debian/ buster-updates main contrib non-free\n#deb-src http://mirrors.ustc.edu.cn/debian/ buster-updates main contrib non-free\n#deb http://mirrors.ustc.edu.cn/debian-security/ buster/updates main contrib non-free\n#deb-src http://mirrors.ustc.edu.cn/debian-security/ buster/updates main contrib non-free" > /etc/apt/sources.list
root@77ec78c7b3b7:/# apt update
Err:1 http://mirrors.ustc.edu.cn/debian buster InRelease
Connection failed [IP: 202.141.176.110 80]
Err:2 http://mirrors.ustc.edu.cn/debian buster-updates InRelease
Connection failed [IP: 202.141.176.110 80]
Reading package lists... Done
Building dependency tree
Reading state information... Done
All packages are up to date.
W: Failed to fetch http://mirrors.ustc.edu.cn/debian/dists/buster/InRelease Connection failed [IP: 202.141.176.110 80]
W: Failed to fetch http://mirrors.ustc.edu.cn/debian/dists/buster-updates/InRelease Connection failed [IP: 202.141.176.110 80]
W: Some index files failed to download. They have been ignored, or old ones used instead.

解决方法:

更改apt的默认UA

printf 'Acquire\n{\n http::User-Agent "Mozilla/5.0 (Windows NT 5.1; rv:25.0) \nGecko/20100101 Firefox/25.0";\n};' > /etc/apt/apt.conf

参考:

原因:

未知。。。,在另一个网络环境下就可以,也是神奇。

P.S. 感谢公司大数据部门的同学,让我又可以水一篇了 xD (划掉划掉)